Get the latest information about How To See All Journal Entries In Quickbooks Online in this article, hopefully providing better understanding for you.
Imagine a world of financial clarity, where every transaction is meticulously recorded, and your business’s financial story unfolds seamlessly. QuickBooks Online’s journal entries hold the key to unlocking this clarity, offering a detailed snapshot of your cash flow and business activities.
How To See All Journal Entries In Quickbooks Online
Like a master storyteller, QuickBooks Online weaves a chronological tale of your company’s financial journey. Each journal entry is a chapter, capturing the essence of every transaction, whether it’s an invoice, expense, or payment. By understanding how to access and decipher these entries, you empower yourself with the knowledge to make informed decisions and keep your business on track.
Finding the Journal Entries
Navigating to your journal entries in QuickBooks Online is a breeze. Simply follow these steps:
- Log into your QuickBooks Online account.
- Click on the “Transactions” menu on the left-hand side.
- Select “Journal Entries” from the drop-down list.
Understanding the Journal Entry Interface
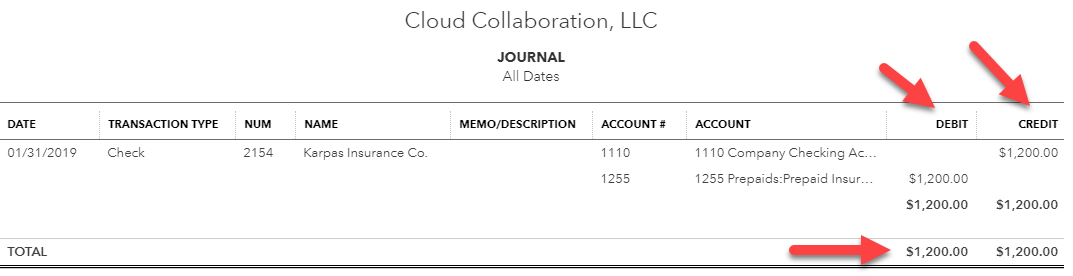
The Journal Entries page presents a comprehensive view of all your recorded transactions. Each entry includes the following information:
- Date and Transaction ID
- Description of the transaction
- Debit and credit amounts
- Account affected
- Memo (optional)
Creating and Editing Journal Entries
QuickBooks Online allows you to create and edit journal entries manually, giving you the flexibility to customize your bookkeeping process. Here’s how:
- Click on the “New” button and select “Journal Entry.”
- Enter the transaction date and a brief description.
- Add the debit and credit amounts, selecting the appropriate accounts.
- Click “Save and Close” to create the journal entry.
Expert Tips for Managing Journal Entries
To optimize your use of journal entries, follow these expert tips:
- Keep your journal entries organized by using a consistent naming convention.
- Review journal entries regularly to identify potential errors or areas of concern.
- Use journal entries to track non-cash transactions, such as depreciation and amortization.
- Take advantage of QuickBooks Online’s automatic journal entry creation features for recurring transactions.
FAQ on Journal Entries
Here are some commonly asked questions about QuickBooks Online journal entries:
- Q: What is the difference between a debit and a credit?
- A: Debits increase asset and expense accounts and decrease liability, revenue, and equity accounts. Credits do the opposite.
- Q: How do I adjust a journal entry?
- A: You can edit existing journal entries or create a correcting entry to reflect the adjustment.
- Q: Can I export journal entries to other programs?
- A: Yes, QuickBooks Online allows you to export journal entries in CSV or Excel formats.
Conclusion
Mastering QuickBooks Online journal entries empowers you to gain a deeper understanding of your business’s financial standing. By following these guidelines and tips, you can harness the power of journal entries to optimize your bookkeeping process and make informed financial decisions. Remember, journal entries are the building blocks of your financial story, so dive in and unlock the clarity they hold.
Are you ready to delve into the world of journal entries and elevate your business’s financial literacy? Share your thoughts and experiences in the comments below.
How To See All Journal Entries In Quickbooks Online
https://youtube.com/watch?v=Otjlzqn_duo
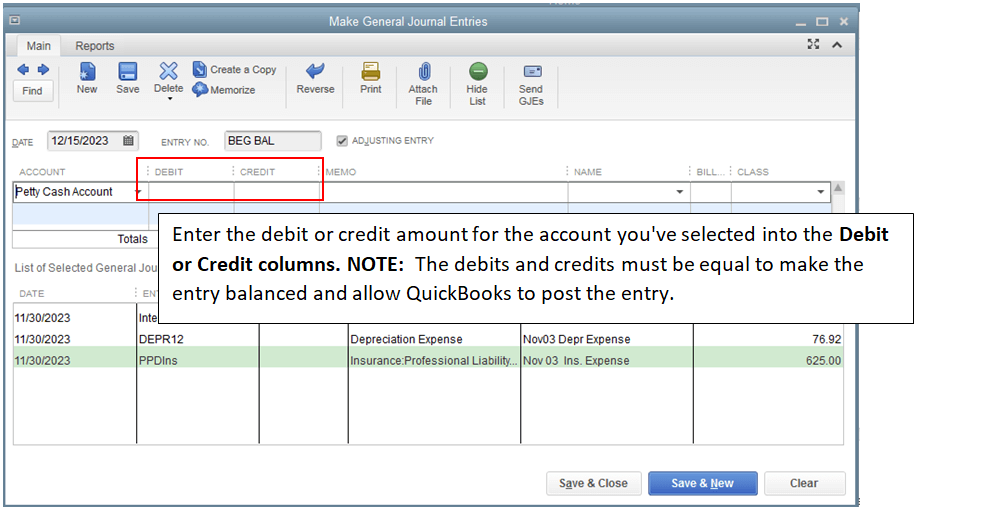
Image: shop.fishbowlinventory.com
How To See All Journal Entries In Quickbooks Online has been read by you on our site. Thank you for your visit, and we hope this article is beneficial for you.
