Your trusty Birkenstocks, the dependable sandals that have carried you through countless adventures, may bear the scars of time. The once-pristine cork footbed, now adorned with dents, scratches, or even unsightly cracks, can elicit a twinge of sadness. But despair not, for it is possible to bestow a second life upon your beloved Birkenstocks, restoring their comfort and longevity.
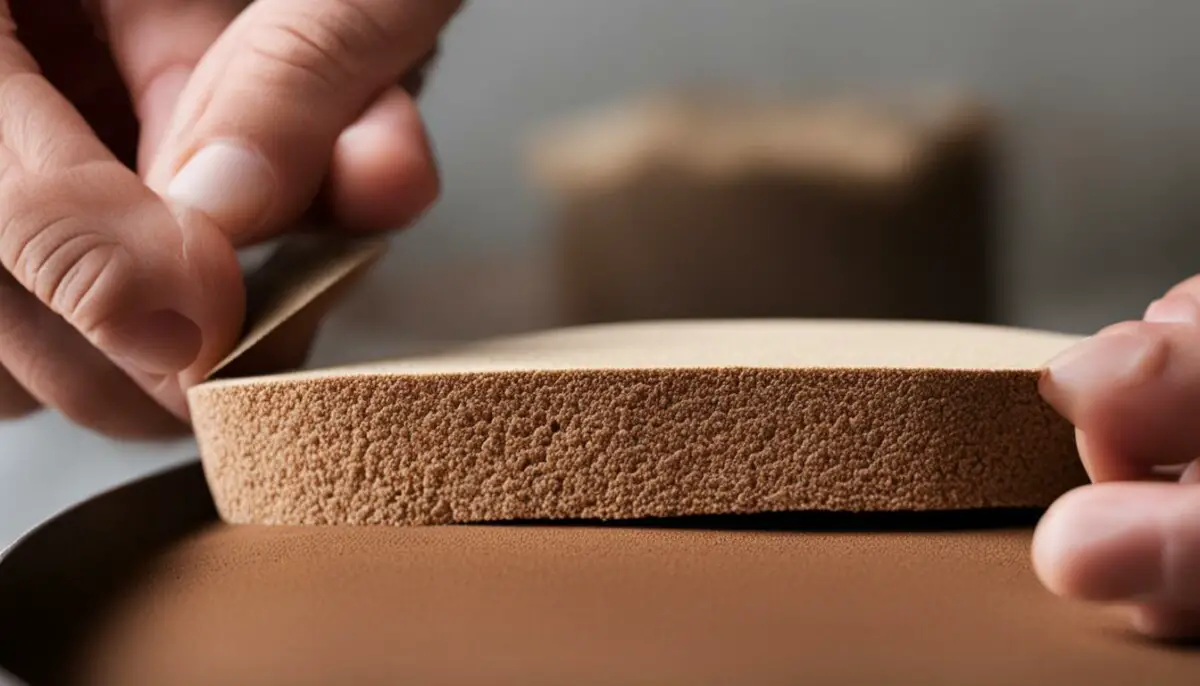
Image: postureinfohub.com
In this comprehensive guide, we delve into the secrets of cork repair, empowering you to revive your cherished footwear with ease. Drawing from expert insights and time-tested techniques, we present a step-by-step roadmap to effectively tackle any cork-related damage.
Assessing the Damage: Determining the Extent of Repair
The first step towards mending your Birkenstocks is to thoroughly examine the extent of the damage. Cork, a porous and resilient material, can withstand a range of wear and tear, but identifying the severity of the damage is crucial for selecting the appropriate repair method.
For minor dents and scratches, a simple sanding and sealing process may suffice. However, deep cracks or crumbling cork require more extensive restoration. In such cases, it is advisable to seek professional repair or consider a full sole replacement.
Step 1: Gathering Essential Materials
Before embarking on the repair adventure, gather the necessary materials. These include:
- Fine-grit sandpaper (120-grit or higher)
- Cork sealant or wood glue
- Soft-bristled brush or foam applicator
- Cotton balls or swabs (optional)
- Clean cloths or paper towels
Step 2: Preparing the Cork Surface
Begin by cleaning the cork surface with a damp cloth to remove any dirt or debris. For stubborn stains, use a mild soap solution and rinse thoroughly with clean water. Allow the cork to dry completely before sanding.
Using fine-grit sandpaper, gently sand the damaged area in circular motions. Aim to smooth out any uneven surfaces, dents, or scratches without removing too much material. Be patient and work gradually, avoiding over-sanding.

Image: www.pinterest.com
Step 3: Applying the Cork Sealant or Glue
Once the cork surface is prepared, it is time to apply the sealant or glue. Choose a cork sealant or wood glue specifically designed for repairing cork. These adhesives offer excellent adhesion and flexibility, ensuring a durable repair.
Using a soft-bristled brush or foam applicator, apply a thin layer of the sealant or glue to the damaged area. If the crack is deep, you may need to apply the adhesive to the sides as well. Fill the crack or hole with enough adhesive to form a slightly raised surface.
Step 4: Shaping and Finishing
Allow the adhesive to set for a few minutes before shaping the repaired area. Use a damp cotton ball or swab to gently press down on the adhesive, smoothing it out and removing any excess. If the sealant is still wet, you can use fine-grit sandpaper to shape the repaired area further.
Once the sealant is completely dry, use a clean cloth or paper towel to wipe away any remaining residue. Your Birkenstocks are now restored to their former glory, ready to embrace new adventures!
Expert Tips for Successful Cork Repair
To ensure a lasting repair, follow these expert tips:
- Test the sealant or glue on an inconspicuous area before applying it to the damaged cork.
- Apply the adhesive sparingly and gradually build up the repaired area to avoid creating a thick, unsightly layer.
- Allow ample time for the sealant or glue to cure fully before using your Birkenstocks.
- Regularly condition the cork footbed with a specialized cork conditioner to maintain its integrity and prevent future damage.
How To Fix Birkenstock Cork
Conclusion
Restoring your damaged Birkenstock cork is a rewarding endeavor that prolongs the lifespan of these iconic sandals while preserving their timeless style. By following the step-by-step process outlined in this guide and adhering to the expert tips provided, you can effectively tackle any cork-related issue. Embrace the joy of mending and reap the countless miles that lie ahead in your rejuvenated Birkenstocks.
Remember that with care and maintenance, your beloved Birkenstocks will continue to provide unwavering comfort and support for years to come.
